Juli 17, 2012
Business Intelligence Part 2: Configuring Reporting Services 2008
Dieser Artikel steht nur in englisch zur Verfügung.
Part 1: Installing SQL Reporting Services
Part 2: Configuring Reporting Services
Part 3: Installing PowerPivot for SharePoint
Part 4: Configuring PowerPivot for SharePoint
Part 5: Configuring PerformancePoint Services
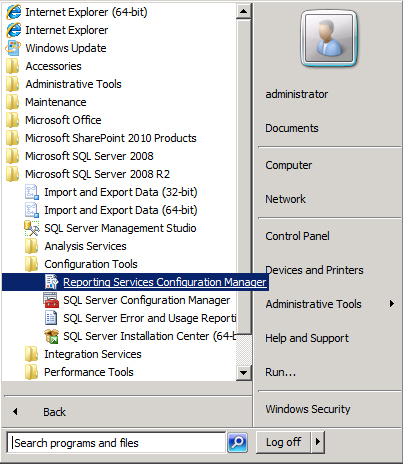
After installation is completed successfully open the Reporting Services Configuration Manager using your SharePoint Farm Account (this may require membership of local).
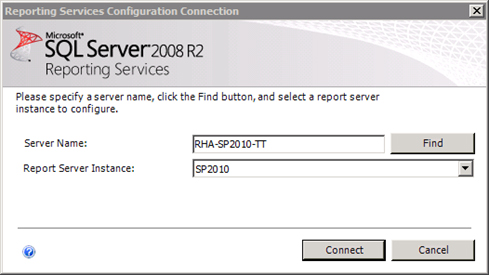
Select the SQL Server and Instance on which you installed the Reporting Services.
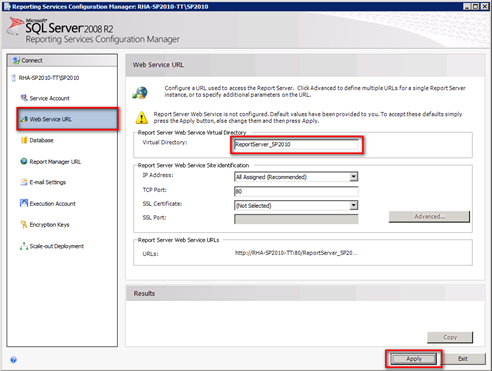
Select Web Service URL, you may change the Virtual Directory name. Click Apply.
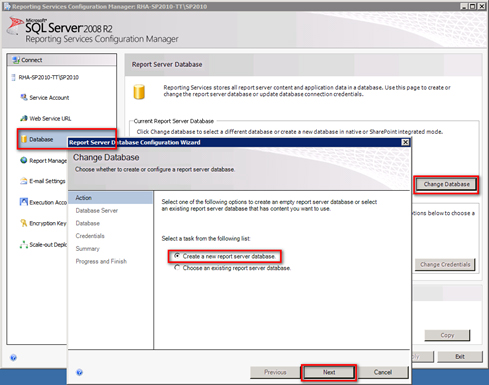
Select Database and click on Change Database to Create a new report server database. Click Next.
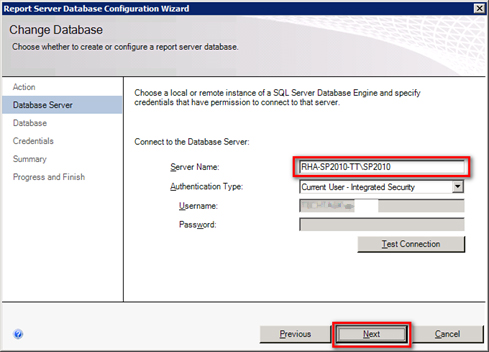
Check the Database Server field. Choose your Authentication Type (normally Integrated Security is used). The user for this action should be the SharePoint Farm account. Click Next.
Adjust the Database Name to meet your companys naming conventions. Select the SharePoint Integrated Mode and click Next.
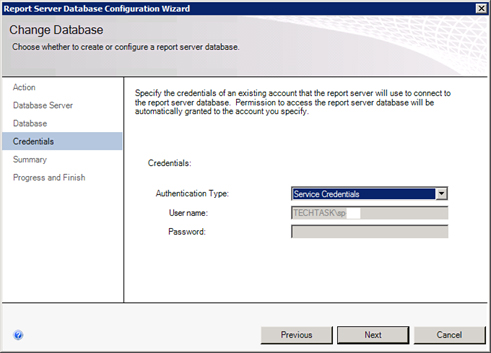
Use the Service Credentials. Click Next, Next, Finish.
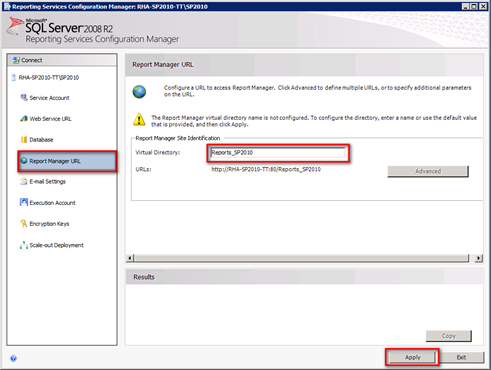
Select Report Manager URL, you may change the Virtual Directory name and click Apply.
You may also configure the other tabs, but they are not needed for our purpose at this time.
Make sure that the SQL 2008 R2 Reporting Services SharePoint 2010 Add-in is installed on the SharePoint server. http://www.microsoft.com/en-us/download/details.aspx?id=9437
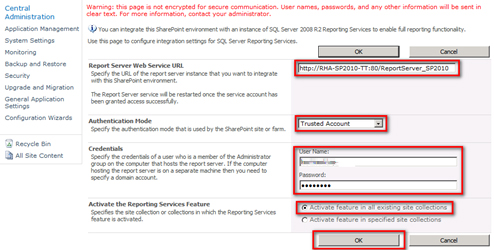
Open the SharePoint Central Administration and click on General Application Settings > Reporting Services > Reporting Services Integration. Enter the Report Server Web Service URL which you defined in the SQL Reporting Configuration Manager. If you are not using Kerberos authentication, you must select Trusted Account as Authentication Method. Enter you SharePoint Farm account credentials and click OK.
After the Reporting Services are successfully configured on the SharePoint server you should see this:
Go to your Site Collection (on which Web Application you activated Reporting Servies earlier) and activate the following:
Under Site Collection Features
Under Site Features
You can now start building your reports.
Juli 16, 2012
Business Intelligence Part 1: Installing SQL Reporting Services 2008 R2
Dieser Artikel steht nur in englisch zur Verfügung.
Part 1: Installing SQL Reporting Services
Part 2: Configuring Reporting Services
Part 3: Installing PowerPivot for SharePoint
Part 4: Configuring PowerPivot for SharePoint
Part 5: Configuring PerformancePoint Services
Double-click setup.exe in the SQL Server 2008 R2 Enterprise binaries on a SharePoint 2010 Application Server.
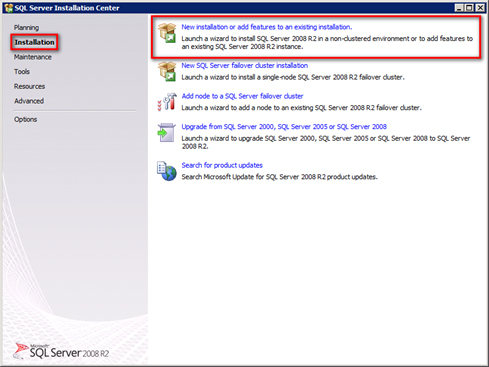
Select the Installation tab and click on New installation or add features to an existing installation.
The Setup Support Rules will be checked. No errors should occur. Click OK.
Sometimes you have to Install the Setup Support Files. Confirm all following queries.
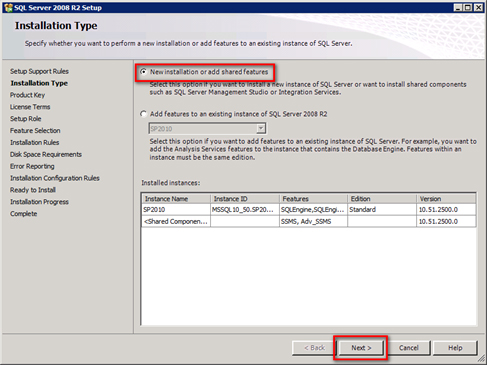
Select New installation or add shared features. Click Next. Enter your License Key and accept the License Terms.
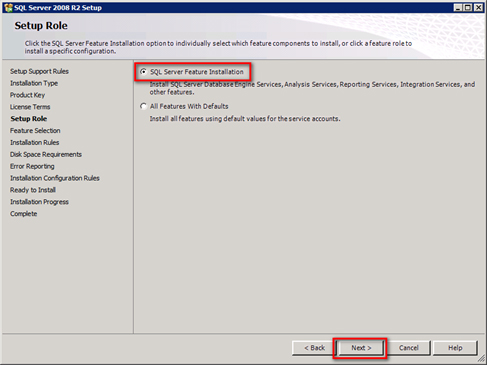
Select SQL Server Feature Installation and click Next.
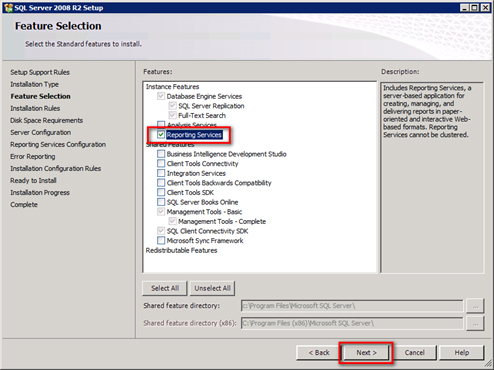
Select Reporting Services and click on Next three times.
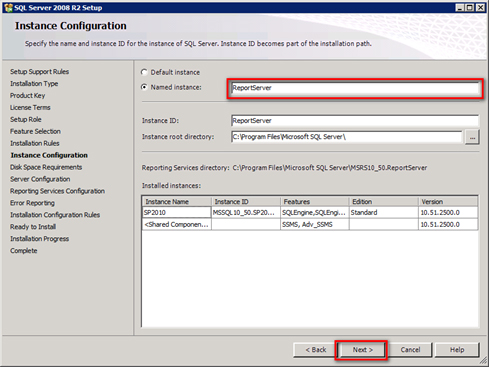
Enter an Instance Name, for example ReportServer.
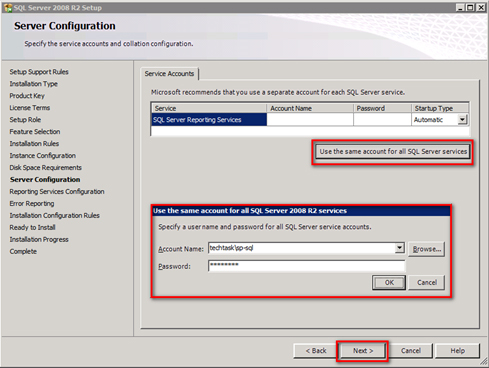
Enter the credentials of a dedicated SQL service account.
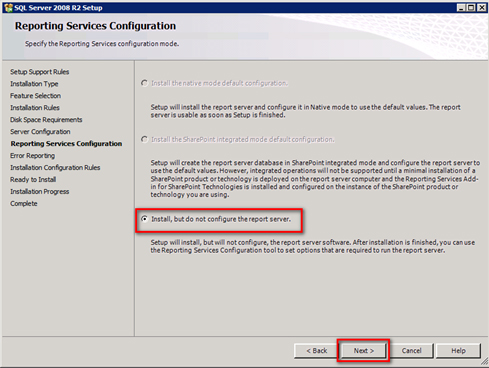
Install, but do not configure the report server should be selected. Click three times on Next then on install button.
Juli 10, 2012
Excel Services: Excel Workbook kann nicht geöffnet werden
Bei der Verwendung der Office Web Apps 2010 in SharePoint 2010 kann es vorkommen, dass Sie folgende Fehlermeldung - beim Versuch ein Excel Workbook zu öffnen - erhalten:
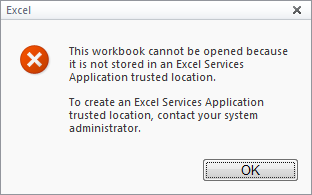
This workbook cannot be opened because it is not stored in an Excel Services Application trusted location.
To create an Excel Services Application trusted location, contact your system administrator.
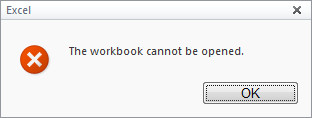
Oder vereinzelnt auch The workbook cannot be opened.
Diese Meldung taucht meist auf, wenn nebst http:// auch https:// verwendet wird. Standardmässig ist in den Excel Services http:// mit der Option Children trusted konfiguriert. Dadruch wird allen auf dem SharePoint Server verwendeten Domains automatisch vertraut. Das Gleiche muss auch für https:// gemacht werden.
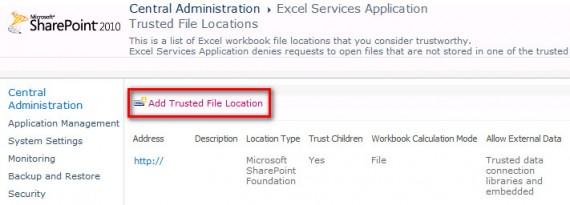
Navigieren Sie dazu in Ihrer Central Administration zu Application Management > Manage Service Applications und klicken Sie auf die Excel Service Application. Öffnen Sie dort Trusted File Locations und klicken Sie dort auf Add Trusted File Location.
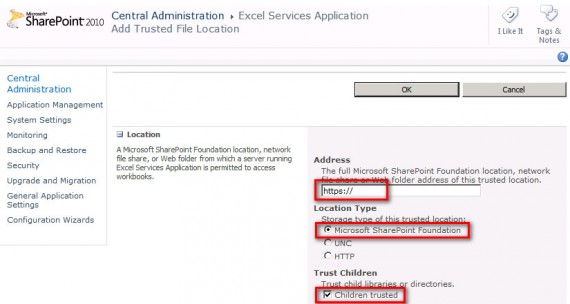
Tragen Sie im Feld Address https:// ein, wählen Sie als Location Type Microsoft SharePoint Foundation aus und setzen Sie bei Children Trusted ein Häkchen.
Juli 10, 2012
Excel Servcies: This workbook is not stored in SharePoint Foundation
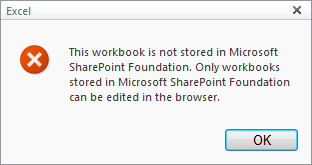
Bei der Verwendung der Office Web Apps 2010 in SharePoint 2010 kann es vorkommen, dass Sie folgende Fehlermeldung - beim Versuch ein Excel Workbook zu bearbeiten - erhalten:
This workbook is not stored in Microsoft SharePoint Foundation. Only workbooks stored in Microsoft SharePoint Foundation can be edited in the browser.
Diese Meldung taucht auf, wenn der zutreffende Trusted File Location Eintrag unter den Excel Servcies falsch konfiguriert wurde.
Navigieren Sie dazu in Ihrer Central Administration zu Application Management > Manage Service Applications und klicken Sie auf die Excel Service Application. Öffnen Sie dort Trusted File Locations.
Überprüfen Sie die bestehenden Einträge (meist http:// und https://), welche auf Ihre SharePoint Farm verweisen darauf, ob unter Location Type Microsoft SharePoint Foundation ausgewählt wurde. In gewissen Fällen wird dort fälschlicherweise HTTP ausgewählt, was zum oben beschriebenen Fehler führt.
Überprüfen Sie in dem Zusammenhang auch gleich, ob bei Children trusted ein Häkchen gesetzt wurde. Falls nicht, sollten Sie dies noch tun.
Juli 10, 2012
Menüeintrag «Recently Modified» im Quick Launch ausblenden
In SharePoint 2010 wird auf Wiki Sites standardmässig im Menü links der Bereich Recently Modified (Kürzlich bearbeitet) angezeigt. Wer das nicht will, kann diesen mit nachstehenden Codeanpassungen entfernen.
Öffnen Sie die v4.master und fügen Sie folgenden Code im Header ein:
<style type="text/css">
.s4-recentchanges
{
display:none;
}
</style>
Anwendern mit Code-Erfahrung empfehle ich eine separate CSS Datei zu erstellen, auf diese in der v4.master zu referenzieren und die Anpassungen dort vorzunehmen. Dadurch bleiben die Änderungen auch bei einem Update der Masterpage bestehen resp. können auf einfache Art und Weise wieder eingebunden werden.
Alternativ können Sie auch die Zeile <asp:ContentPlaceHolder id="PlaceHolderLeftActions" runat="server"> zu <asp:ContentPlaceHolder id="PlaceHolderLeftActions" runat="server" Visible="false"> ändern. Dies kann jedoch vereinzelt zu Fehlermeldungen führen, weshalb die erste Variante bevorzugt werden sollte.


