Dieser Artikel steht nur in englisch zur Verfügung.
Part 1: Installing SQL Reporting Services
Part 2: Configuring Reporting Services
Part 3: Installing PowerPivot for SharePoint
Part 4: Configuring PowerPivot for SharePoint
Part 5: Configuring PerformancePoint Services
Double-click setup.exe using the SharePoint 2010 Setup Account in the SQL Server 2008 R2 Enterprise binaries on the same SharePoint 2010 Application Server as you already installed the SQL Reporting Services.
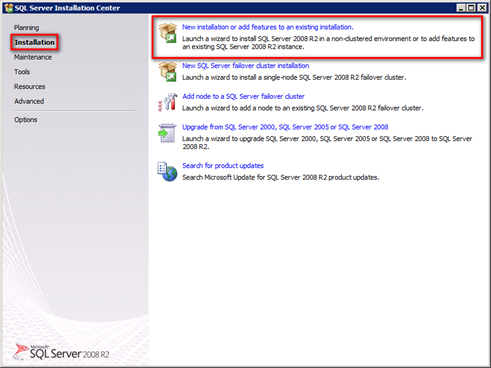
Select the Installation tab and click on New installation or add features to an existing installation.
The Setup Support Rules will be checked. No errors should occur. Click OK.
Sometimes you need to Install the Setup Support Files. Confirm all following queries.
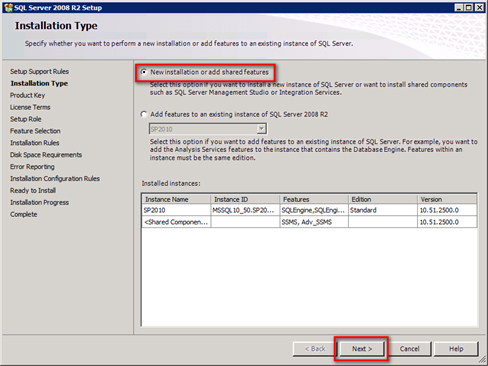
Select New installation or add shared features. Click Next.
Enter your License Key and accept the License Terms.
Select SQL Server PowerPivot for SharePoint and choose Existing Farm, if your SharePoint Farm is already configured. Click Next, Next, Next.
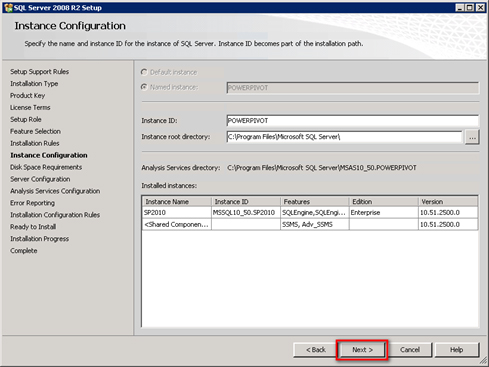
Create a new Instance named POWERPIVOT. Click Next, Next.
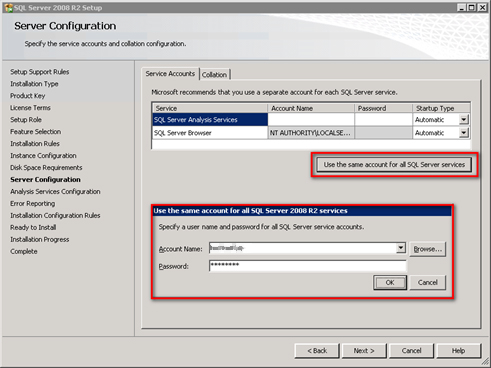
Enter the credentials of a dedicated SQL service account.
Go to the Collation Tab and change the collation to Latin1_General_CS_AS_KS_WS. Klick Next.
The Analysis Services Configuration window displays. Add the users you need. In this case SharePoint Setup and SharePoint Farm Accounts. Go to the Data Directories tab and change the directory locations.
Click Next, Next, Next, Install.

Roger Haueter
I'm a passionate leader and Senior Systems Architect based in Bern, Switzerland. I primarily focus on cloud strategy consulting for Microsoft 365.


